How to Use Moxa Therapy at Home?
Nov 27, 2024
Last time we had an Introduction of what is Moxa and Moxibustion Therapy. Today let’s see how Modern Moxibustion works. I’ll walk you through the steps to get started with moxa therapy along with safety tips, recommended settings, and protocols for different conditions. Plus, we’ve included a downloadable PDF guide to help you along your Wellness Journey!
Moxa Therapy Tools:
1. Smartpod(s): Electric moxibustion device utilizing infrared and magnetic therapy for heating the Moxa Patch(es).

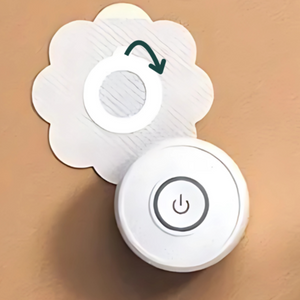
2. Moxa Patch(es): Compressed mugwort covered by non-woven fabrics, surrounded with double-sided stickers, the round circle-shaped side is for attaching the Smartpod, and the other side is for attaching to the body (skin).

Step-by-Step Guide for Using Moxa Therapy at Home
1. Setting Up the Smartpod for Your Session
- Before starting, ensure the Smartpods are fully charged in the home station, and use the USB cable included in the device package.
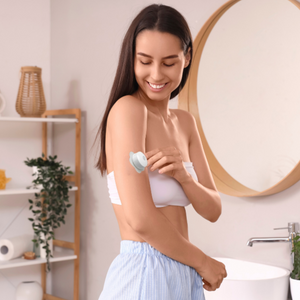
- Select the area of the body where you’d need to apply moxa therapy, removing any clothing or accessories that may interfere.
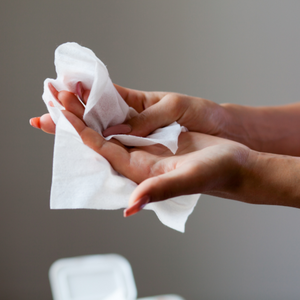
- Ensuring your skin is clean, dry, and free from lotions or oils.
-
Remove the cover from the circle-shaped sticker, then attach the moxa patch to the bottom of a Smartpod, aligning it securely with the heating plate.

2. Choosing Your Temperature
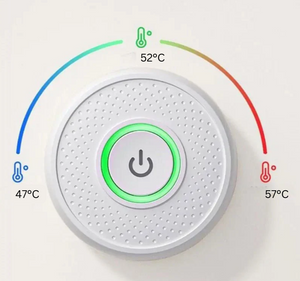
- Low (47°C, Blue Light): Great for sensitive areas and beginners.
- Medium (52°C, Green Light): Ideal for general muscle relaxation.
- High (57°C, Red Light): Recommended for deep relief, especially for chronic tension or stiffness.


3. Recommended Acupoints Protocols for Neck Shoulder Pain Relief
- Ashi Points - Muscle Pain Spot(s): This acupoint is located where you have sore muscle spots. “Ashi” literally means “Ah! Yes!” in Chinese. Ashi points also mean “uncertain points” and “tender points”. Such points generally depend on the problems, are mostly located near the source, and have no fixed location or name. "If there is pain, it is the Ashi point." By pressing, the point(s) where you feel soreness, numbness, swelling, pain, and heaviness is(are) the Ashi point(s).
- Jianjing point GB-21: On both shoulders. The functions of these points are: neck and shoulder pain relief, balance blood pressure, and stimulate blood circulation. CAUTION: Pregnant women can not use moxibustion and especially DON’T stimulate these points in any other physical treatment such as massage and physiotherapy.
- Dazhui point DU-14: Single point. The functions of this point are: reducing neck and shoulder stiffness, easing rigidity in the spine column, and relieving fever and headache.
- Feishu points BL-13: On both sides. The functions of these points are: reducing shoulder stiffness, soothing the respiratory system, alleviating cough and asthma symptoms, and promoting Qi flow.
- Tianzhu points BL-10: On both sides. The functions of these points are: reducing neck rigidity, easing symptoms of cervical spondylopathy, and relieving cold-related nasal congestion and sore throat.


4. During the Session
- Regularly check your skin for any signs of redness or irritation. Adjust the temperature if necessary.
- Avoid applying direct pressure on the heated area by leaning on the Smartpod(s).
- Turn off the power button of Smartpod(s) manually or allow it to shut off automatically after 30 minutes.
5. Post-Session Care
- Avoid direct exposure to cold drinks for 30 minutes after your session.
- Hydrate with 2-3 glasses of warm water or herbal tea without caffeine to aid your body’s natural response.
- Carefully remove the moxa pads to avoid irritation, and follow the recycling protocol if applicable.
- Wipe the bottom of Smartpod(s) with a dry cloth if there is residual glue from the stickers.
- Charge the Smartpod(s) if you have a 60+ minute session.
Safety Tips for Using Moxa Therapy at Home
- Medical Considerations: Consult a healthcare professional before using moxa if you have heart disease, diabetes, or other serious medical conditions or if you’re pregnant.
- Avoid Certain Areas: Do not apply moxa near sensitive areas like the eyes or large blood vessels. Children under 14 years old should only use it under adult supervision.
- Troubleshooting: If the device malfunctions, turn it off, disconnect from power, and contact customer service.


